How to Create an Email Template in Gmail
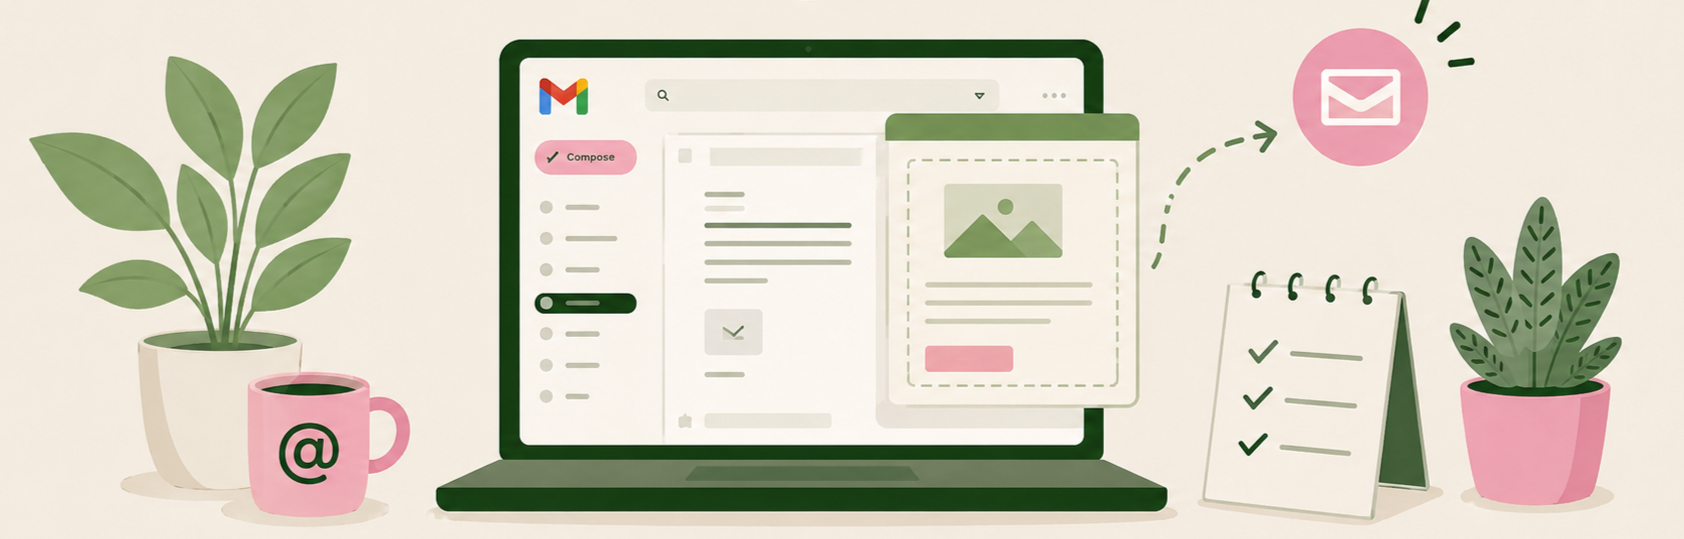
You almost certainly have emails that you send over and over in your business. Things like your onboarding email, the podcast invite, or the client project wrap up.
If you're rewriting these emails from scratch every time, or digging through your sent folder trying to find the past emails you wrote perfectly so you can reuse it, Gmail templates are about to make your day.
Setting this up takes only minutes, and once you do, you’ll never have to write or search for that email again!
Let's dig in.
🚨 Heads up
You'll need to be on a computer for this. Templates only exist in Gmail on a browser, so the Gmail app on your phone is the one place you won't find them.
If you respond to messages on your phone a lot, I recommend saving them as Drafts, so you can easily copy and paste the text into a new email.
Step 1: Turn templates on
Templates come switched off by default, so this is the first stop. It takes about thirty seconds.
1. Open Gmail on your computer.
2. Click the gear icon in the top right, then See all settings.
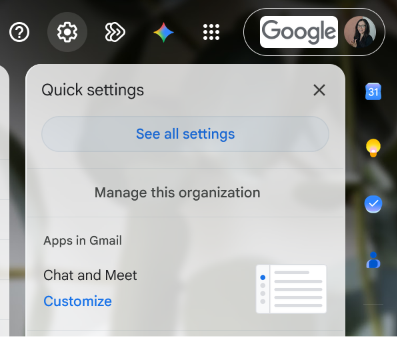
3. Click the Advanced tab along the top.
4. Find Templates and click Enable.
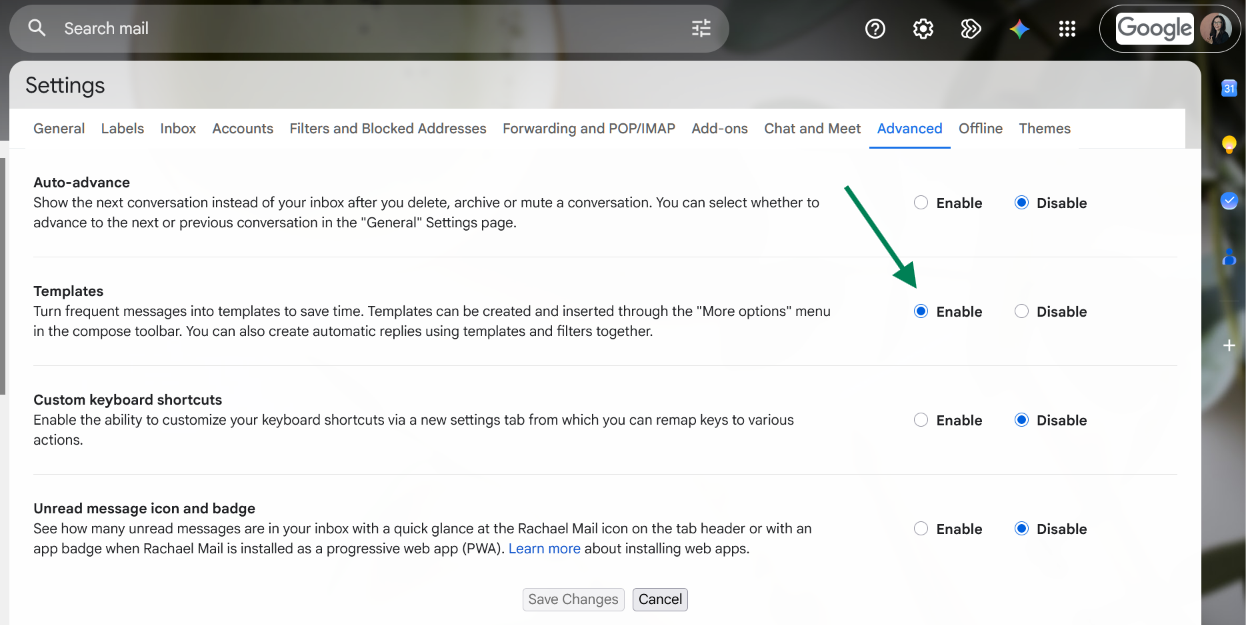
5. Scroll all the way to the bottom and click Save Changes. Gmail will reload.
That's it, you did it!
Note: Templates don't carry over between accounts.
If you run more than one email account for your business, turn this on in each of them while you're thinking about it.
Step 2: Save your first template
1. Click Compose.
2. Write the email exactly the way you'd want to send it. Skip the recipient field, though. Gmail doesn't save recipients with a template, so anything you put there disappears.
3. At the bottom right of the compose window, click the three dots (More options).
4. Hover over Templates, then Save draft as template, then Save as new template.
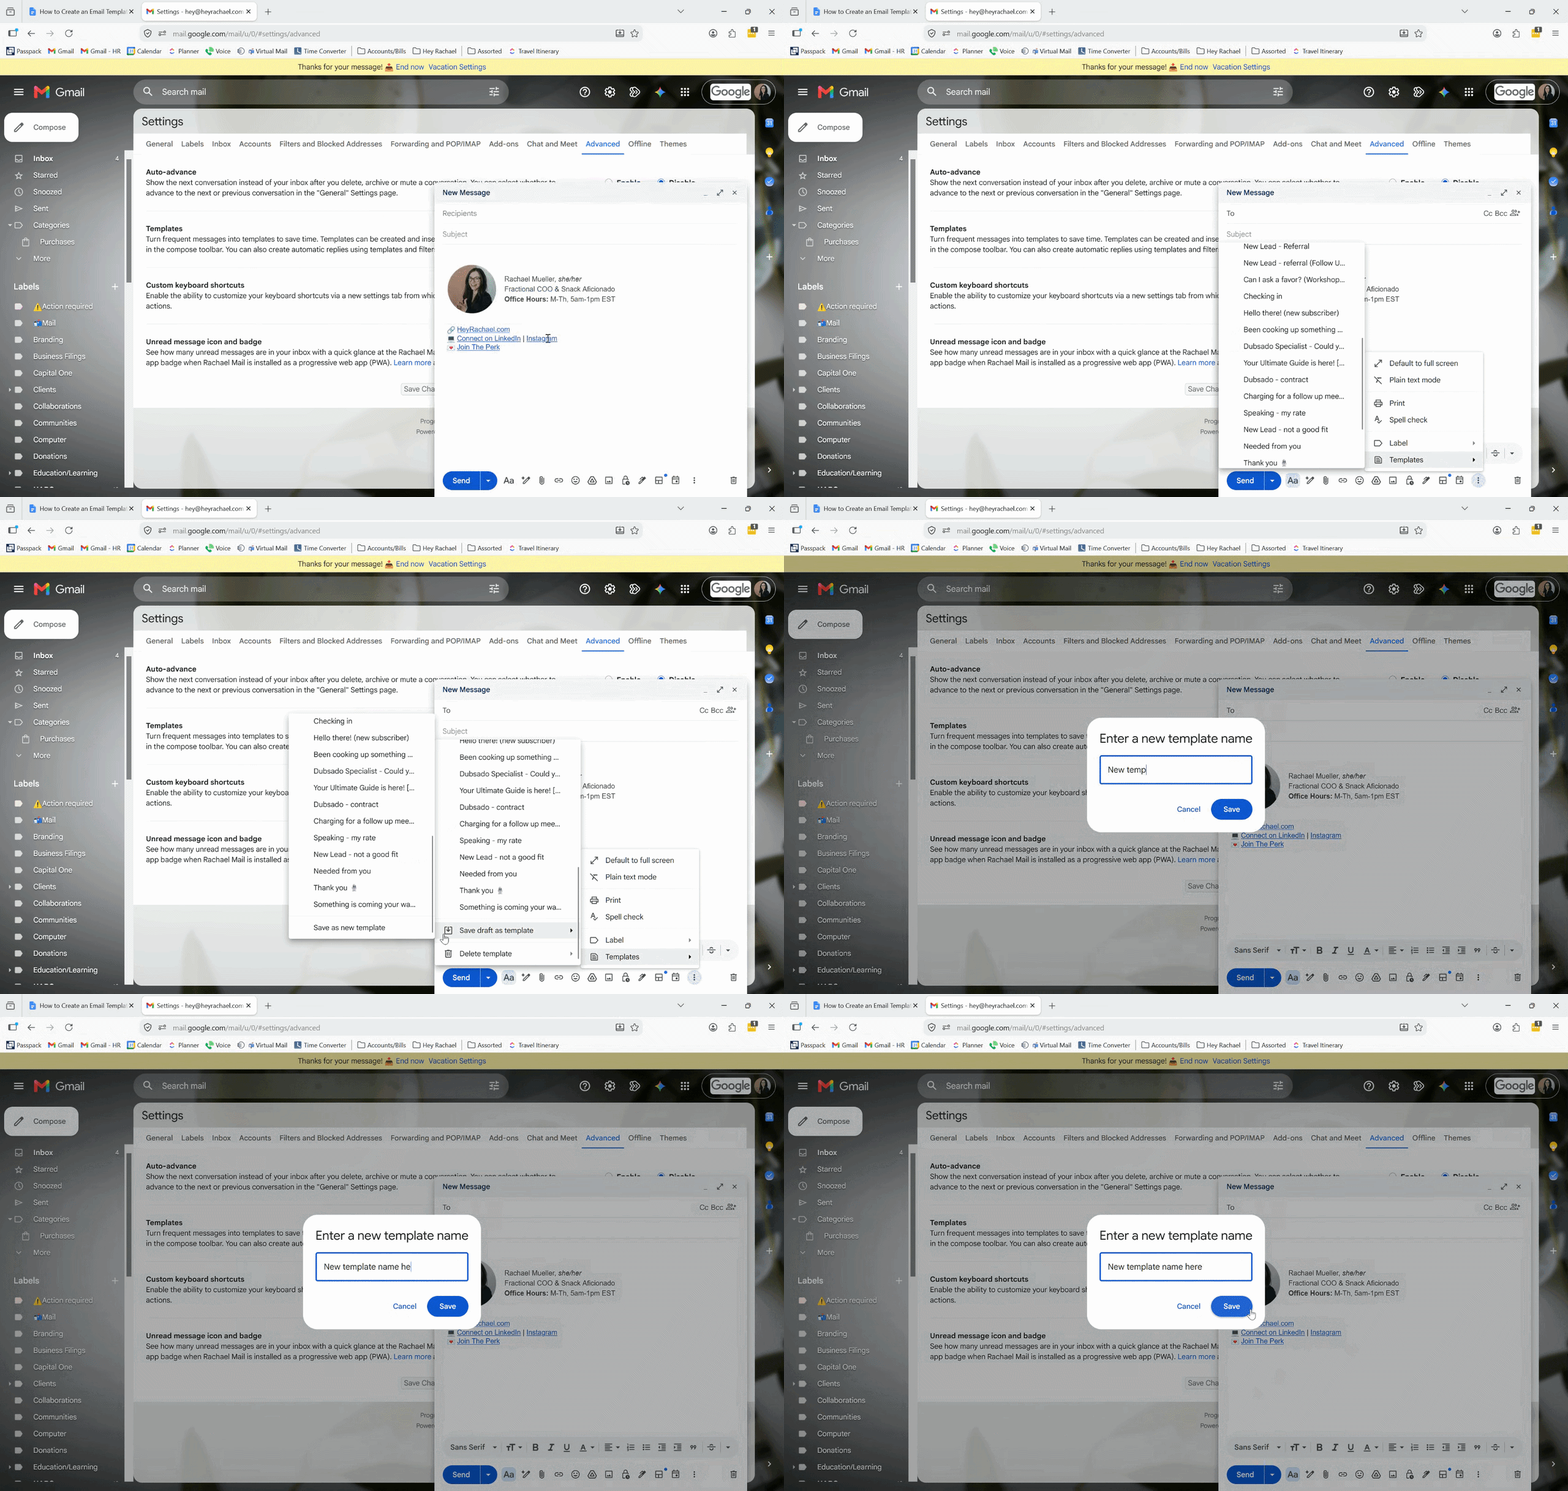
5. Give it a name and click Save. That email is now saved for good, or at least until you decide to change it.
🚨 One thing to know before you name it
Your template name becomes the subject line every time you compose a new email.
Which means the name that makes a template easy to find in your list, something like "Onboarding FINAL," is what lands in your their inbox unless you catch it before you send.
Two ways to handle it. Name your templates exactly the way you want the subject line to read, and you never think about it again. Or name them however helps you find them, and change the subject line every time you insert one.
The exception to this, is if you reply to an email using a template, the existing subject line will not be replaced.
Leave yourself placeholders
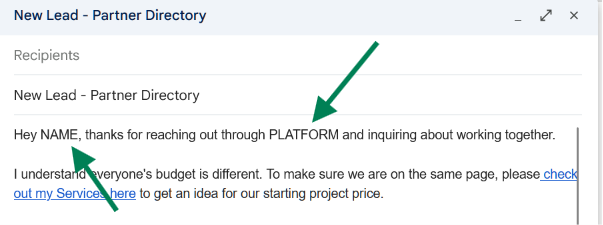
Anything that needs to be customized (the client's name, a start date, etc.) should be impossible to miss when you open the template. All caps, inside brackets, red text color, all works well to get your attention, so you remember to customize before hitting send.
Here’s an example how I set up mine:
Step 3: Use it
1. Click Compose, or hit Reply on an email. Templates work in both.
2. Click the three dots (More options) at the bottom right.
3. Hover over Templates, and under Insert template, choose yours.
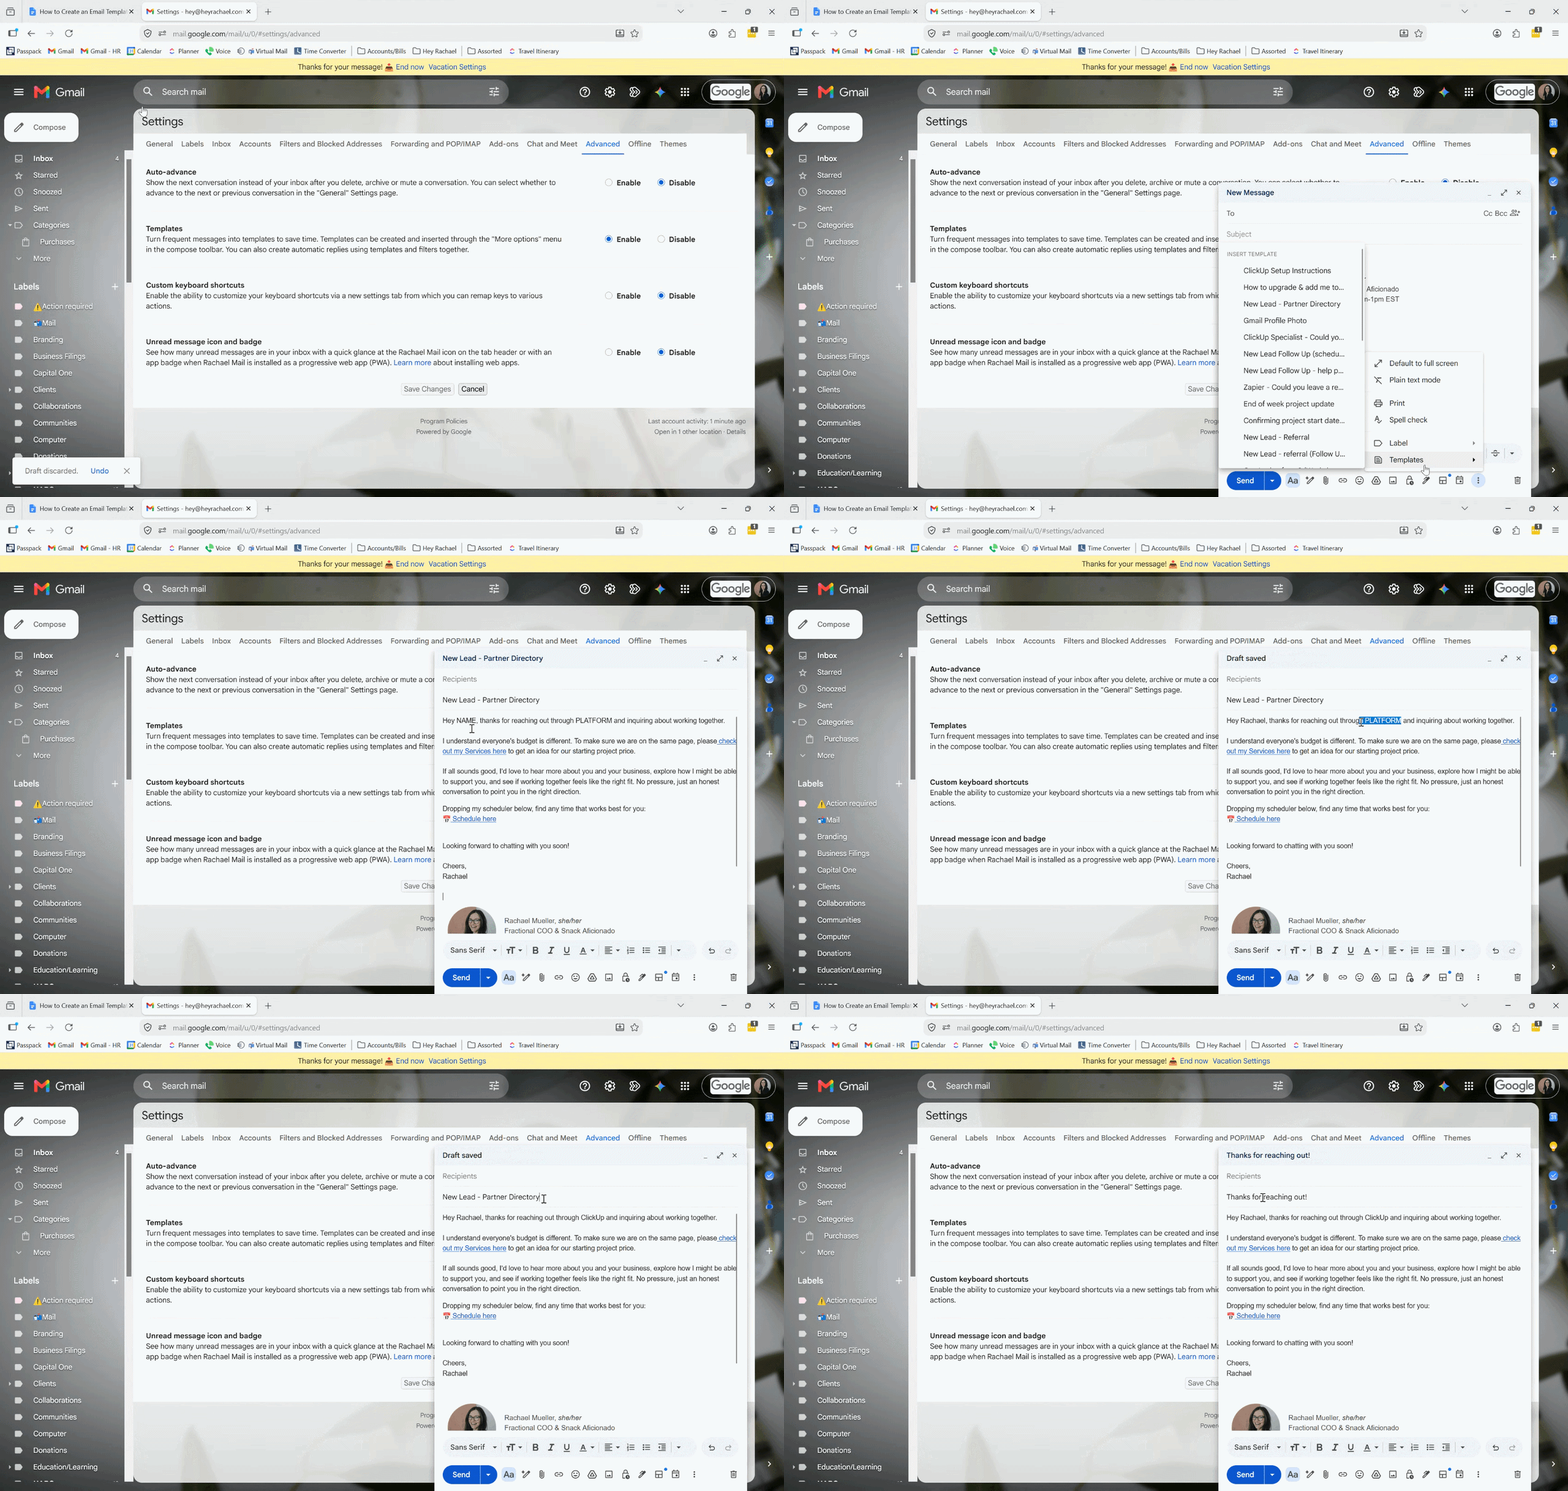
4. Fill in your placeholders, fix the subject line if you need to, add anything specific to this person, and send.
How to change or delete a template
There's no edit button, which is a little counterintuitive. You update a template by saving a new version over the old one.
To update one: Open the template in a new email, make your changes, then go back to the three dots, Templates, Save draft as template, and click your existing template's name under Overwrite Template. Confirm with Save.
To delete one: Three dots, Templates, Delete template, choose it, click Delete.
Note that deleted templates don't go to a trash folder, and there's no undo.
A few things templates won't do on their own, but I’ve got solutions!
Attachments. A template won't hold a file, but you can embed links. Put the file in Google Drive or Dropbox, and while you're building the template, use the Embed Link. The link saves right along with everything else, and your recipient can easily click through to the file.
Note: Make sure you are sharing this file publicly, so anyone with the link can view.
Team access. A template lives inside one Gmail account. To share yours with a team member, send them a copy, along with a link to this blog 😉, and let them share in the joy of their own Gmail templates!
One thing to know: those copies are independent from that point on. When you update yours, theirs stays exactly as it was. If a template changes often, or has to stay identical across your team, it's worth keeping the primary version somewhere you all work from (like a Doc or SOP guide) and re-sharing when it changes.
Happy emailing!
FAQ
-
They live under the Advanced tab rather than General, and they're off until you enable them. If there's no Advanced tab at all, you're likely on a Google Workspace account where your admin has restricted settings access.
-
Not with the built-in feature. Turning templates on and inserting them both require Gmail in a browser. If you respond to messages on your phone a lot, I recommend saving them as Drafts, so you can easily copy and paste the text into a new email. There are also third-party extensions that add mobile support if that's a dealbreaker for you.
-
The template's name becomes the subject line when you insert it, so name it with that in mind. If your name is more of a filing label, change the subject before you send.
-
Bold, links, bullets, and inline images generally hold up fine. Attachments won’t.
-
Same feature, new name. Google renamed Canned Responses to Templates. If you set some up years ago, they're still in there.
🤳🏻P.S. Can everyone see how cute you are?
Did you know there’s a good chance that your Google profile picture is not showing up for others?
You might be missing one crucial setting, and what others are actually seeing when you email looks like this:

👉🏻To verify (and fix) this problem, check out this blog!
Ready to hand off more than your email?
A template takes one repeated task off your plate. If you're looking at the laundry list of everything else and wondering how to lighten the load, that's a bigger conversation, and a fixable one. Let's talk about what's possible!
Liked This Article? Pin It For Later!